

A home theater can convert any given living room into an entertainment sanctuary. Great for movies, gaming, or any other immersive viewing experience. A projector is a great modern, compact replacement for traditional TVs. It strikes a unique balance between technology and comfort to give you a sleek, cinematic atmosphere.
However, a stunning living room projector setup doesn’t only take projection. One also requires cabinets that will help keep the entire arrangement organized and sleek. They boost functionality designed to complement your space.
This guide will show you how to design the ultimate setup. Know how to select the best cabinet and achieve a continuous experience.
Why a Living Room Projector Setup is a Game-Changer
A projector can turn any living room into a true home theater. It delivers an immersive experience for movies, gaming, and sports. Unlike traditional TVs, projectors offer unique benefits that enhance entertainment and style.
Key Advantages of a Living Room Projector Setup
Bigger Screen, Better Experience – Enjoy a 100-inch display for a more cinematic feel.
- Sleek & Space-Saving – Mount it on walls or ceilings for a clean, modern look.
- Cost-Effective Alternative – Get cinema-quality visuals without paying for a huge OLED TV.
- Organized & Clutter-Free – A well-designed AV cabinet hides wires and keeps things neat.
- Versatile & Multi-Purpose – Great for movies, gaming, streaming, and presentations.
Finding the Perfect Spot for Your Projector
Proper placement affects image quality and the viewing experience. Consider both practicality and aesthetics to achieve the best results.
Best Projector Placement Options
- Shelf or Cabinet – A shelf or AV cabinet offers flexibility and easy access.
- Projector Lift – A ceiling-mounted lift hides the projector when not in use. It keeps your space clean and stylish.
- Ceiling Mount – Mounting on the ceiling prevents obstructions and improves clarity. Adjustable arms help fine-tune positioning.
Tip: Avoid direct light to reduce glare and maintain image quality.
Essential Steps for Setting Up Your Living Room Projector Like a Pro
Setting up a projector is about more than just plugging it in. It’s about creating a seamless, immersive experience. Follow these steps to set up your projector and achieve top performance with a sleek, organized setup.
1. Choose the Right Projector
Start with the right projector for your space:
- Resolution: Pick 1080p or 4K for clear, crisp images.
- Brightness: Choose 2500+ ANSI lumens for bright rooms.
- Throw Distance: Use short-throw for smaller rooms. Go for long-throw for bigger spaces.
- Connectivity: Ensure HDMI, Bluetooth, and Wi-Fi are available for easy connection.
2. Find the Ideal Projection Screen Placement
A good screen is key for immersion:
Wall or Pull-Down?: A projection screen beats a wall in quality.
Viewing Distance: Stay 10 to 15 feet from the screen.
Light Reflection: Avoid light sources and use blackout curtains to reduce glare.
3. Position Your Projector
Placement is vital for the best picture:
- Measure Distance: Refer to the manual for throw distance.
- Mounting Options: Use a ceiling mount or tripod for flexibility.
- Level the Projector: Ensure the projector is stable and level.
- Keystone Correction: Fix distortion with keystone adjustments.
4. Set Up the Projection Screen
Once the projector is set, adjust the screen:
- Align with the Lens: Keep the screen aligned with the projector’s lens.
- Screen Material: Use a matte white screen for clear images.
- Pull-Down Screen: Check tension to avoid wrinkles.
5. Connect the Cables
Proper cable connections ensure a top experience:
- HDMI Cable: Use it for both video and audio.
- Cable Management: Use Velcro ties for neat organization.
- Check Ports: Ensure your devices are compatible with the projector.
6. Power Up and Adjust Settings
Now, turn on the projector and adjust:
- Power On: Start the projector and wait for the screen.
- Initial Setup: Adjust brightness, contrast, and language settings.
- Select Input: Choose the correct source with the remote.
7. Focus the Lens
For the sharpest image, focus the lens:
- Manual or Remote Focus: Adjust the focus ring or use the remote.
- Test Patterns: Use built-in patterns for better precision.
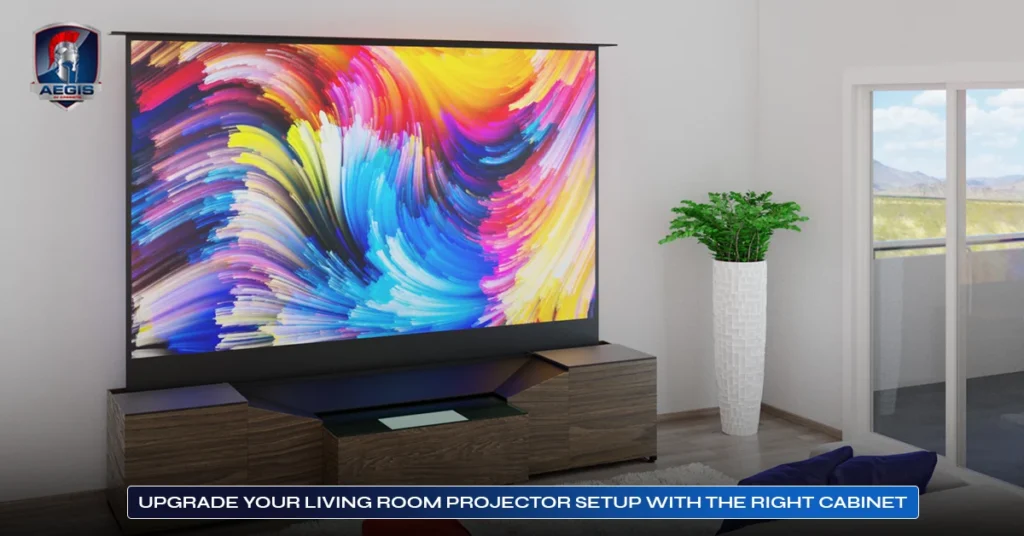
8. The Importance of a Projector Cabinet
A projector cabinet keeps everything organized:
- Airflow: Ensure proper ventilation to avoid overheating.
- Cable Management: Hide cables for a neat, clean look.
- Secure Mounting: Ensure the cabinet supports both the projector and accessories.
Choosing the Best Living Room Projector Setup Cabinet

Selecting the right cabinet for your projector setup is essential. A well-chosen cabinet enhances the look of your space. It keeps your equipment organized and safe. Here’s how to choose the ideal cabinet for your living room projector setup:
1. Cabinet Size & Design
Compact vs. Full-Sized
- If you’re short on space, opt for a slim cabinet. For larger spaces, choose a full-sized unit with extra storage.
Open or Closed Storage
- Open shelves give easy access and a sleek look. Closed storage hides clutter and protects from dust and spills.
2. Material & Durability
Choose a cabinet that is both stylish and durable.
Wood & MDF
- A classic and durable choice for traditional spaces.
Glass & Metal
- Ideal for a modern, sleek aesthetic.
Ventilated Panels
- Look for cabinets with ventilated panels to keep equipment cool and prevent overheating.
3. Customization Options
A custom cabinet tailored to your equipment is a great option.
Custom-Built Compartments
- Designed for your projector, gaming consoles, and media players.
Cable Management
- Keep cables neat with built-in cable management features like pass-throughs and tie-downs.
Adjustable Shelving
- Easily adjust shelves to fit different equipment sizes.
4. Ventilation
Proper ventilation is critical to avoid overheating.
Open Backs or Ventilation Slots
- Allow for better airflow and reduce heat buildup.
Built-in Cooling Fans
- Some cabinets include integrated cooling systems for extra protection.
5. Cable Management Solutions
A tidy setup keeps your living room organized.
Cable Pass-Throughs and Channels
- Route cables neatly through dedicated channels to avoid tangles.
Tie-Downs
- Secure cables in place to maintain a clean, organized look.
6. Storage for Accessories
Your cabinet should also provide storage for other AV components.
Shelves, Drawers, or Compartments
- Perfect for Blu-ray players, consoles, and remote controls.
Storage Flexibility
- Look for adjustable shelves to accommodate various devices.
7. Style & Design
The cabinet should match your living room’s decor.
Modern & Minimalist
- Consider glass and metal cabinets for a sleek look.
Traditional & Rustic
- Wooden cabinets can add warmth and charm to your space.
Customization for Design Needs
- Some cabinets can be customized to match your decor.
8. Build Quality
Ensure the cabinet is durable and supports your equipment.
Durable Materials
- Solid wood or high-quality metal ensures a sturdy construction.
Stability & Support
- The cabinet should securely hold the weight of your projector and other equipment.
9. Adjustability
Flexibility helps the cabinet adapt as your setup changes.
Adjustable Shelves
- Easily modify the interior to fit new devices.
Modular Components
- Look for cabinets with removable or adjustable pieces for future upgrades.
Optimizing Your Living Room Projector Setup
Want to enhance your home theater experience? Consider these essential upgrades to take your projector setup to the next level.
1. Use a Projector Throw Distance Calculator
Tools like XTEN-AV’s projector throw calculator help you find the ideal projector placement. Simply input your room dimensions, screen size, and aspect ratio. It will provide optimal placement suggestions to ensure the best image quality.
2. Create a Home Theater Projector Setup Diagram
Visualizing your setup can help with precise positioning. Use tools like XTEN-AV’s X-DRAW to create a diagram. This will include projector placement, screen size, room dimensions, and speaker layout, ensuring everything fits perfectly.
3. Consider Wireless HDMI
Wireless HDMI technology eliminates the need for cables. It transmits high-definition audio and video signals wirelessly, reducing clutter. Make sure the system covers the necessary distance and supports low latency for gaming or live video.
4. Acoustics Matter
Improve your sound quality by adding acoustic panels. Treating your walls and floors can reduce echo and reverberation. This ensures crisp, clear audio that complements your visuals.
5. Control Your Lighting
Lighting plays a key role in the viewing experience. Use blackout curtains to block external light. Consider dimmable lights to fine-tune the ambiance. This will enhance contrast and improve the clarity of your projector’s image.
Aegis AV: The Best Custom AV Cabinet for Your Projector Setup
Aegis AV offers tailored AV cabinets designed for your needs. Our cabinets are not one-size-fits-all. Each design is unique, fitting perfectly with your living room décor and projector requirements. We focus on ventilation, cable management, and storage to enhance both function and style.
Why Choose Aegis AV?
- Tailor-Made Designs – Get a custom cabinet built just for you.
- Premium Materials – We use high-quality wood, metal, and ventilation panels.
- Seamless Cable Management – Keep wires hidden and organized.
- Enhanced Protection – Your projector stays safe from dust and damage.
Aegis AV’s custom cabinets provide a luxury setup that’s both functional and clutter-free. It’s the best investment for your home theater. Contact us today to design your ultimate projector cabinet!
FAQs
Is a Projector Good for a Living Room?
Projectors offer a big-screen experience at home. They provide large, cinema-like images that TVs can’t match. With the right setup, you can bring the thrill of the big screen directly to your living room. Projectors are a great choice for a cinematic home theater experience.
What Are The Common Mistakes To Avoid When Setting Up A Living Room Projector?
When setting up a projector, avoid a few common mistakes. Don’t place the projector too far from the screen. Distance affects image quality. Also, avoid placing the projector near light sources. Ambient light can wash out the image. Be mindful of cable management, too. Cluttered wires can damage your equipment and ruin the look of your setup. Finally, test the projector’s placement before finalizing it. Minor adjustments can make a big difference in the viewing experience.
How to Improve the Picture Quality of My Projector in a Living Room?
Start by adjusting settings like brightness, contrast, and sharpness to improve the picture quality. A high-quality projection screen can also help. If you’re using a plain wall, make sure it’s smooth, matte, and light-colored. Control the lighting in the room. Avoid using the projector in bright rooms or use blackout curtains. Some projectors feature keystone correction to fix distorted images. For a more immersive experience, consider upgrading to a 4K projector.
Can I Use a Projector Without a Screen in My Living Room?
Yes, you can use a projector without a screen. However, a proper screen will provide better image quality. A plain wall can work but won’t reflect light as effectively. Choose a smooth, matte wall if you don’t want a dedicated screen. Light-colored walls, like white or light grey, provide the best results.
What is the Difference Between a Short Throw and Long Throw Projector?
Short throw projectors are ideal for small spaces. They work well within 4 to 10 feet. Long throw projectors, on the other hand, require more distance. Typically, they need at least 10 feet. Long throw projectors are perfect for larger rooms where space isn’t limited.
How Do I Hide Wires and Cables in a Projector Setup?
Cable management channels are perfect for concealing your projector setup. They can be mounted within walls or ceilings. If you wish it to look seamless, in-wall conduits need to be installed. Look for armoire cabinets with built-in cable management. Wireless HDMI transmitters can help minimize cabling.
The Final Word
Well, that justifies it. Setting up the perfect living room projector setup requires detailed planning. Choose a standing cabinet to hold the projector at just the right distance and where cables can be well hidden and blended. Paying attention to these details is what will turn your living room into a Heaven for cinema lovers. Off-the-shelf or custom options from Aegis AV will definitely enhance your watching experience while yielding sophistication in your home.